Adding text in FCP is easy but it can come off as overwhelming to a newbie or a person that is not familiar with the app interface. In this guide, we will discuss how to add and customize text in a Final Cut Pro project.
Add Basic Titles and Lower Third on Your Timeline in FCP
Basic Title – It is the default title that is present in FCP without any effects and animation.
Lower Third – It is a type of title (usually placed at the bottom of the screen) that is used to display someone’s name on the display.
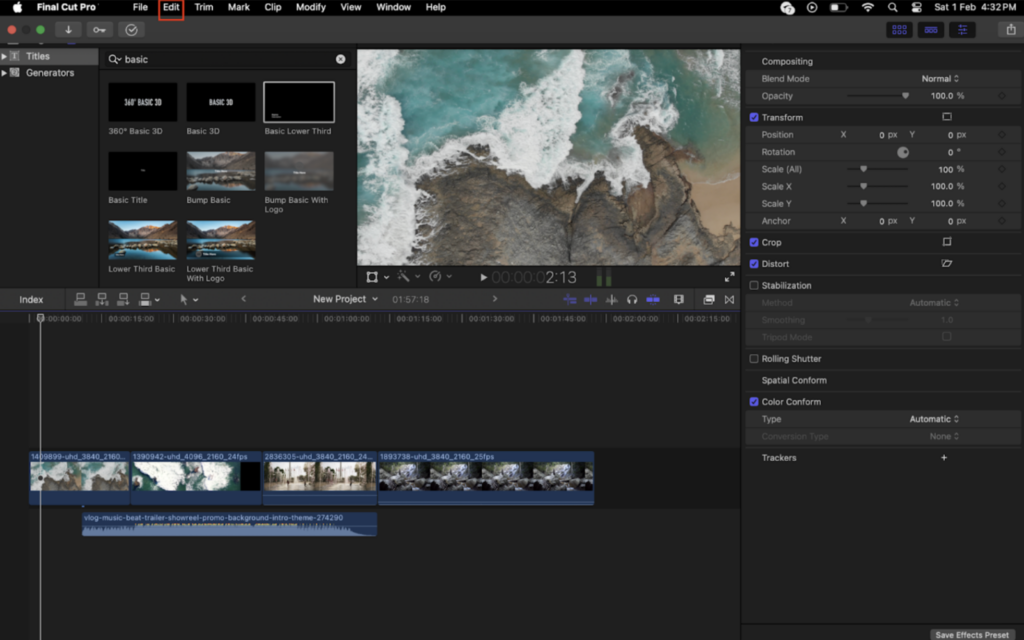
Once you’ve opened Final Cut Pro PC or Mac, you have to prepare your timeline (arranging your clips on the timeline in which you want to add text to) by dragging and dropping video or audio clips. You can add your Basic Titles as a primary timeline and also as a secondary layer to the primary timeline.
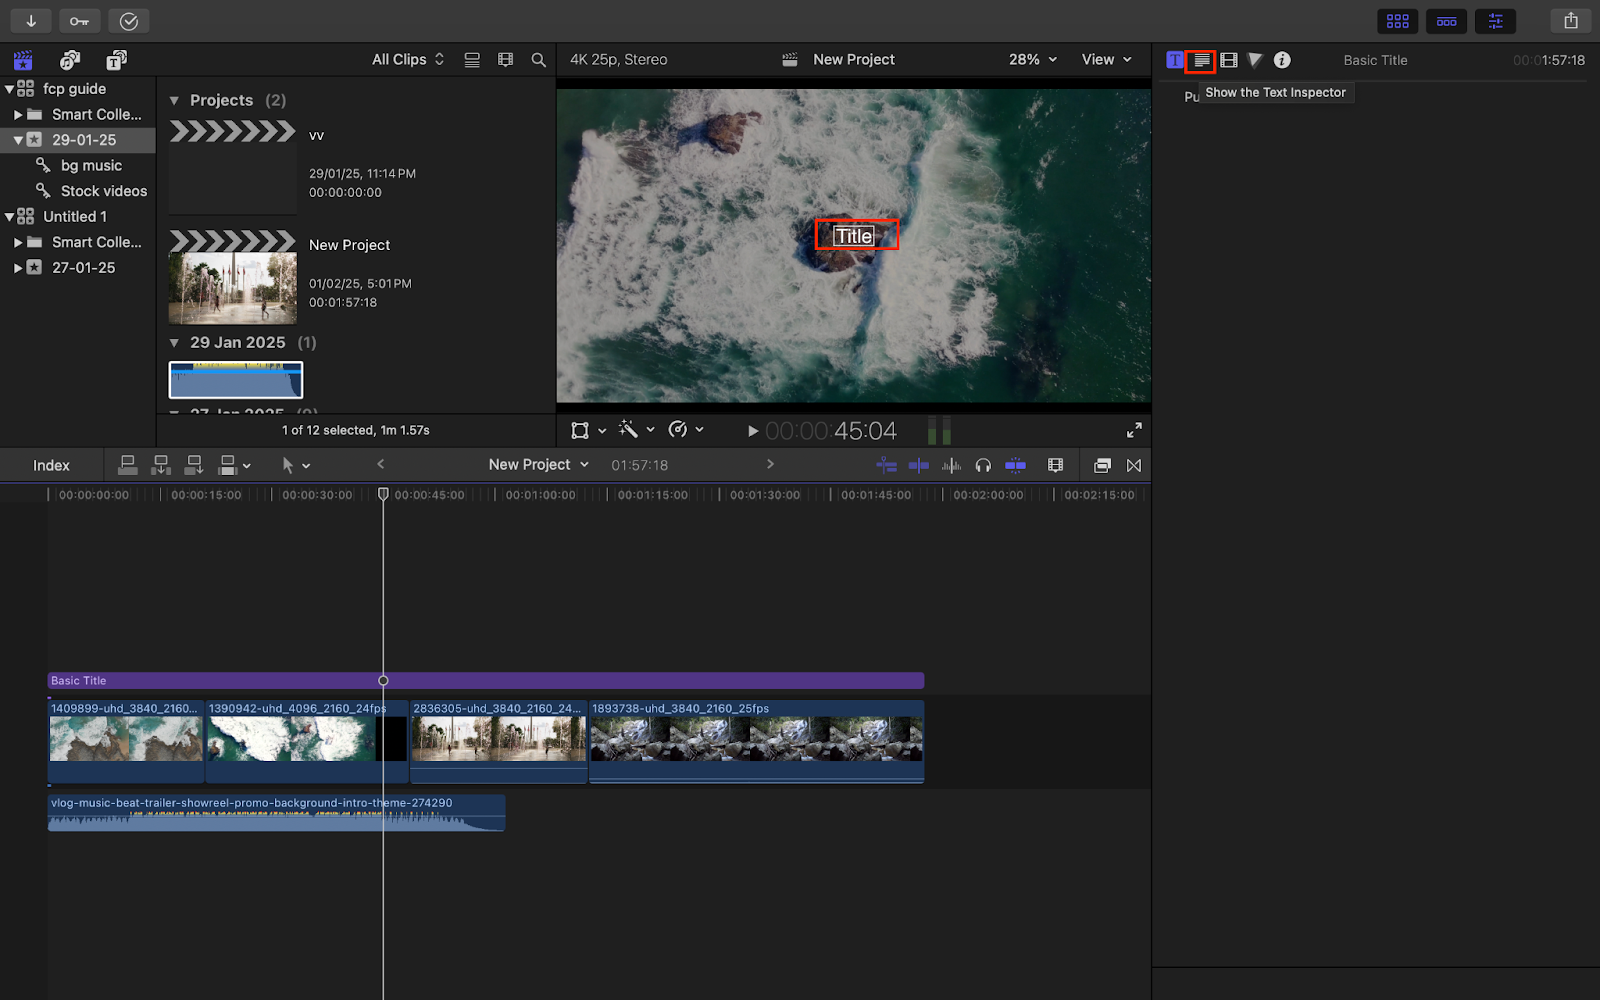
To add Basic Titles on your timeline, click on the edit button present at the top left in FCP.
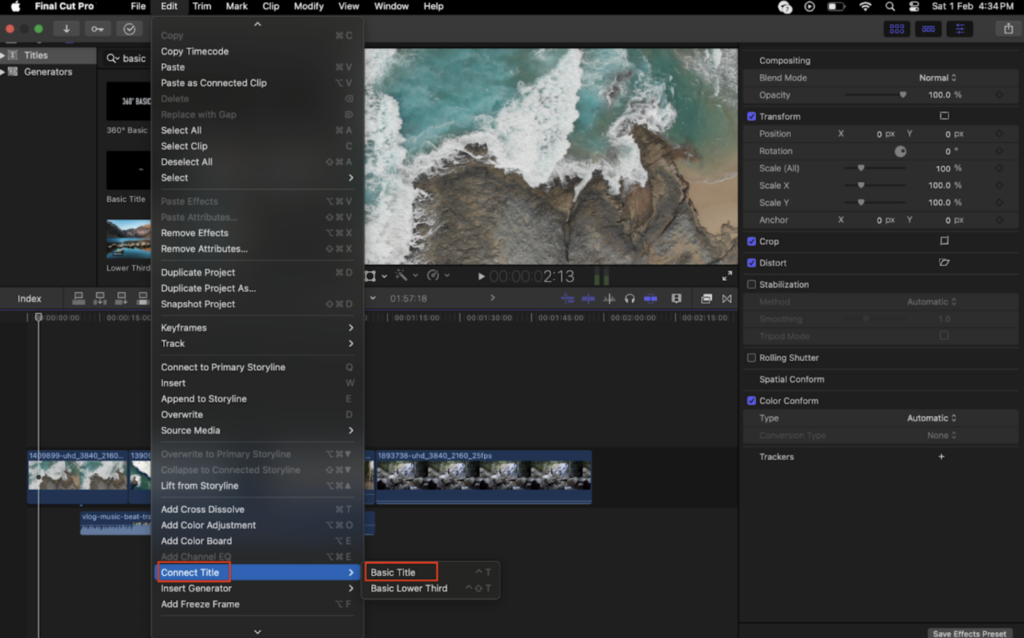
Now, go to “Connect Title,” and then click on “Basic Title.”
Keyboard shortcuts-
- Basic title: Control + T
- Basic Lower Third: Control + Shift + T
This will add a purple title layer to the timeline.
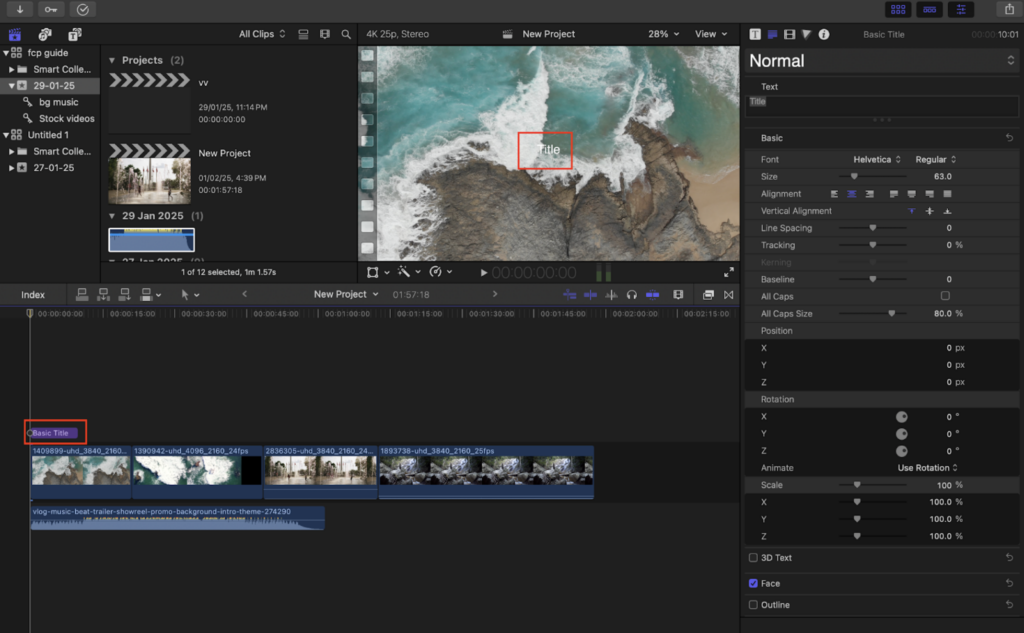
You can drag it across the length of your timeline and place it wherever you want it to appear.
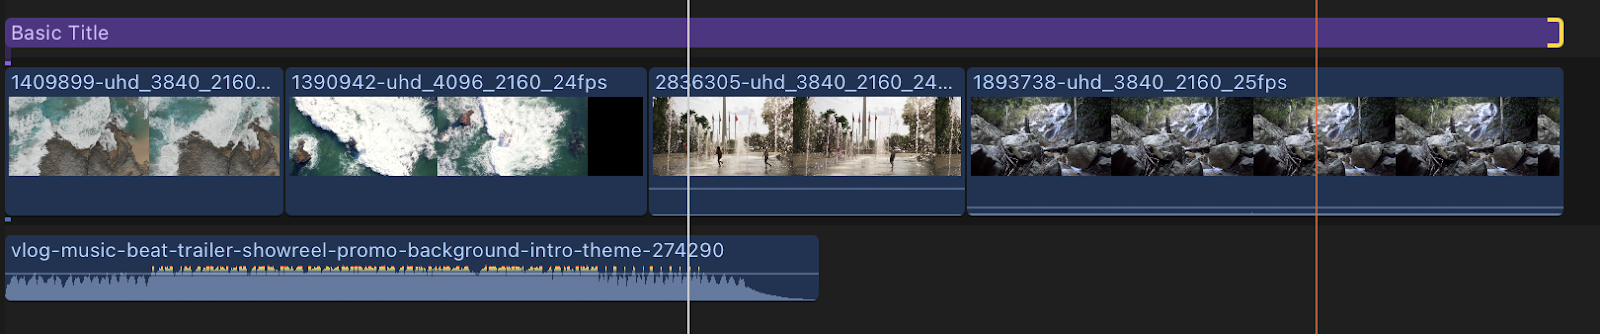
You can add it as a secondary layer as we did it in the screenshot above or as a part of the primary timeline as shown below.


Editing Basic Titles
After adding the “Title” (as a secondary layer or as a part of the primary timeline), you can edit it by clicking the “Text Inspector” button in the taskbar or you can click on the “Title” (in the middle of your screen) to open the “Text Inspector” directly.

After opening “Text Inspector” you can see multiple options to edit your text. We will discuss them one by one.
Text
In this section, you can write your texts in the box given below. Any text written in this box will appear in the Viewer.
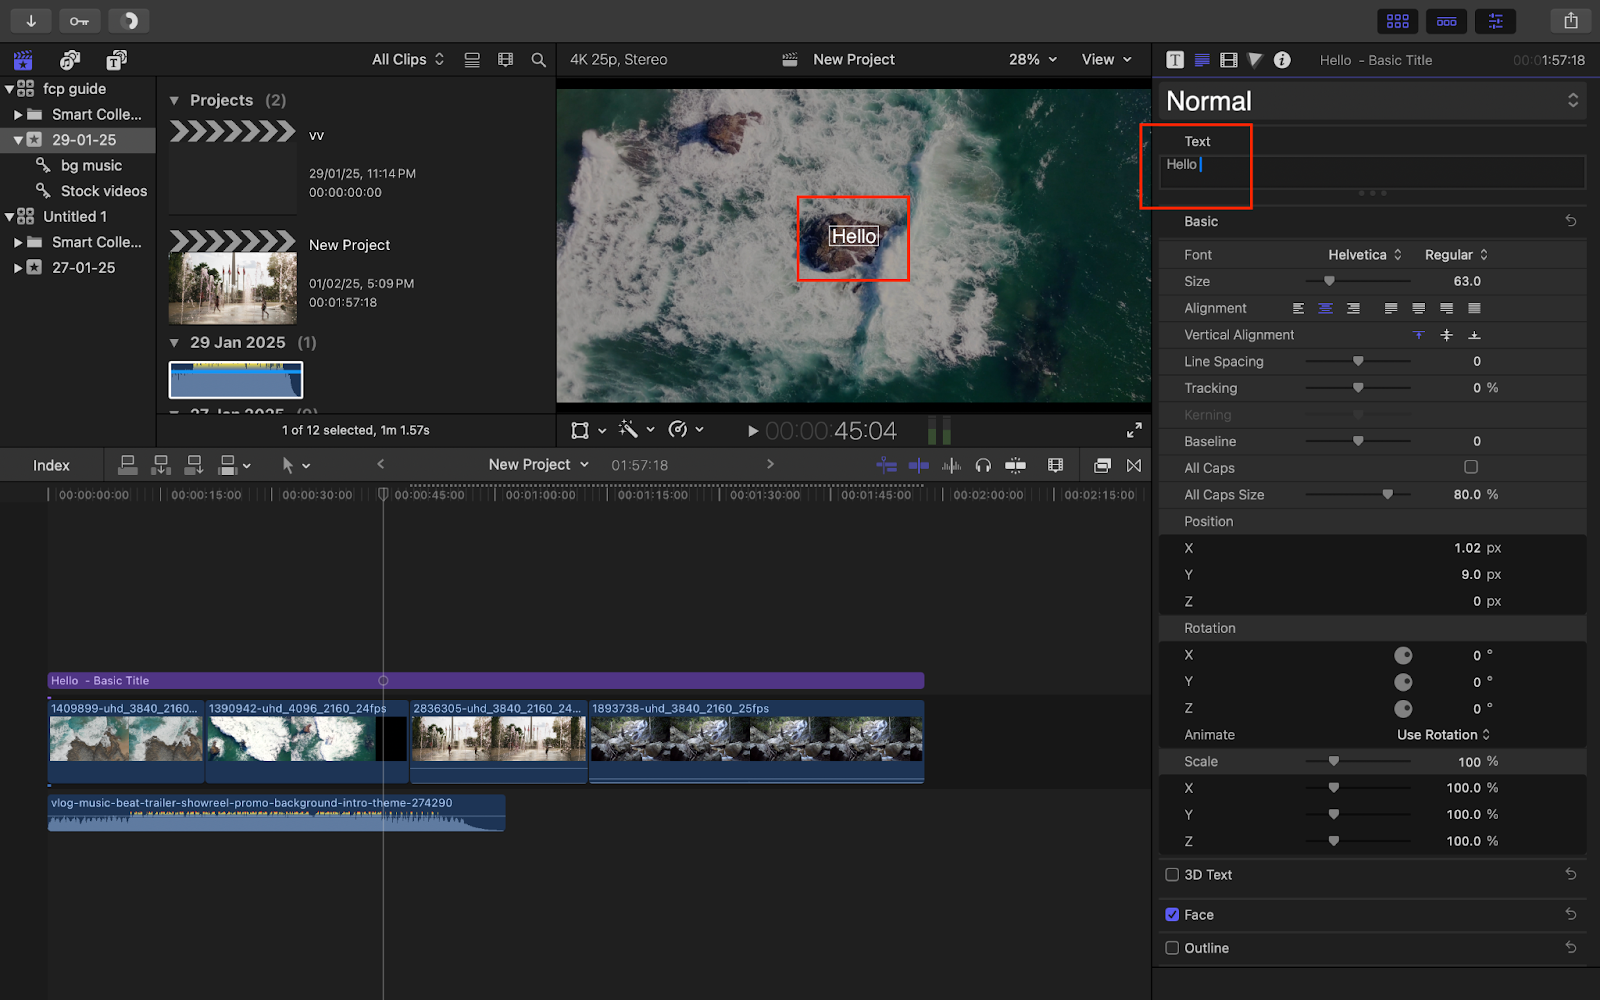
Basic
Below the “Text” section there is a “Basic” section which is by default expanded or you can expand it by clicking on “Show.”
 |  |
The “Basic” section allows users to customize their textual content by changing the font styles, font size, alignment, line spacing, and more. Let’s discuss these customizations.
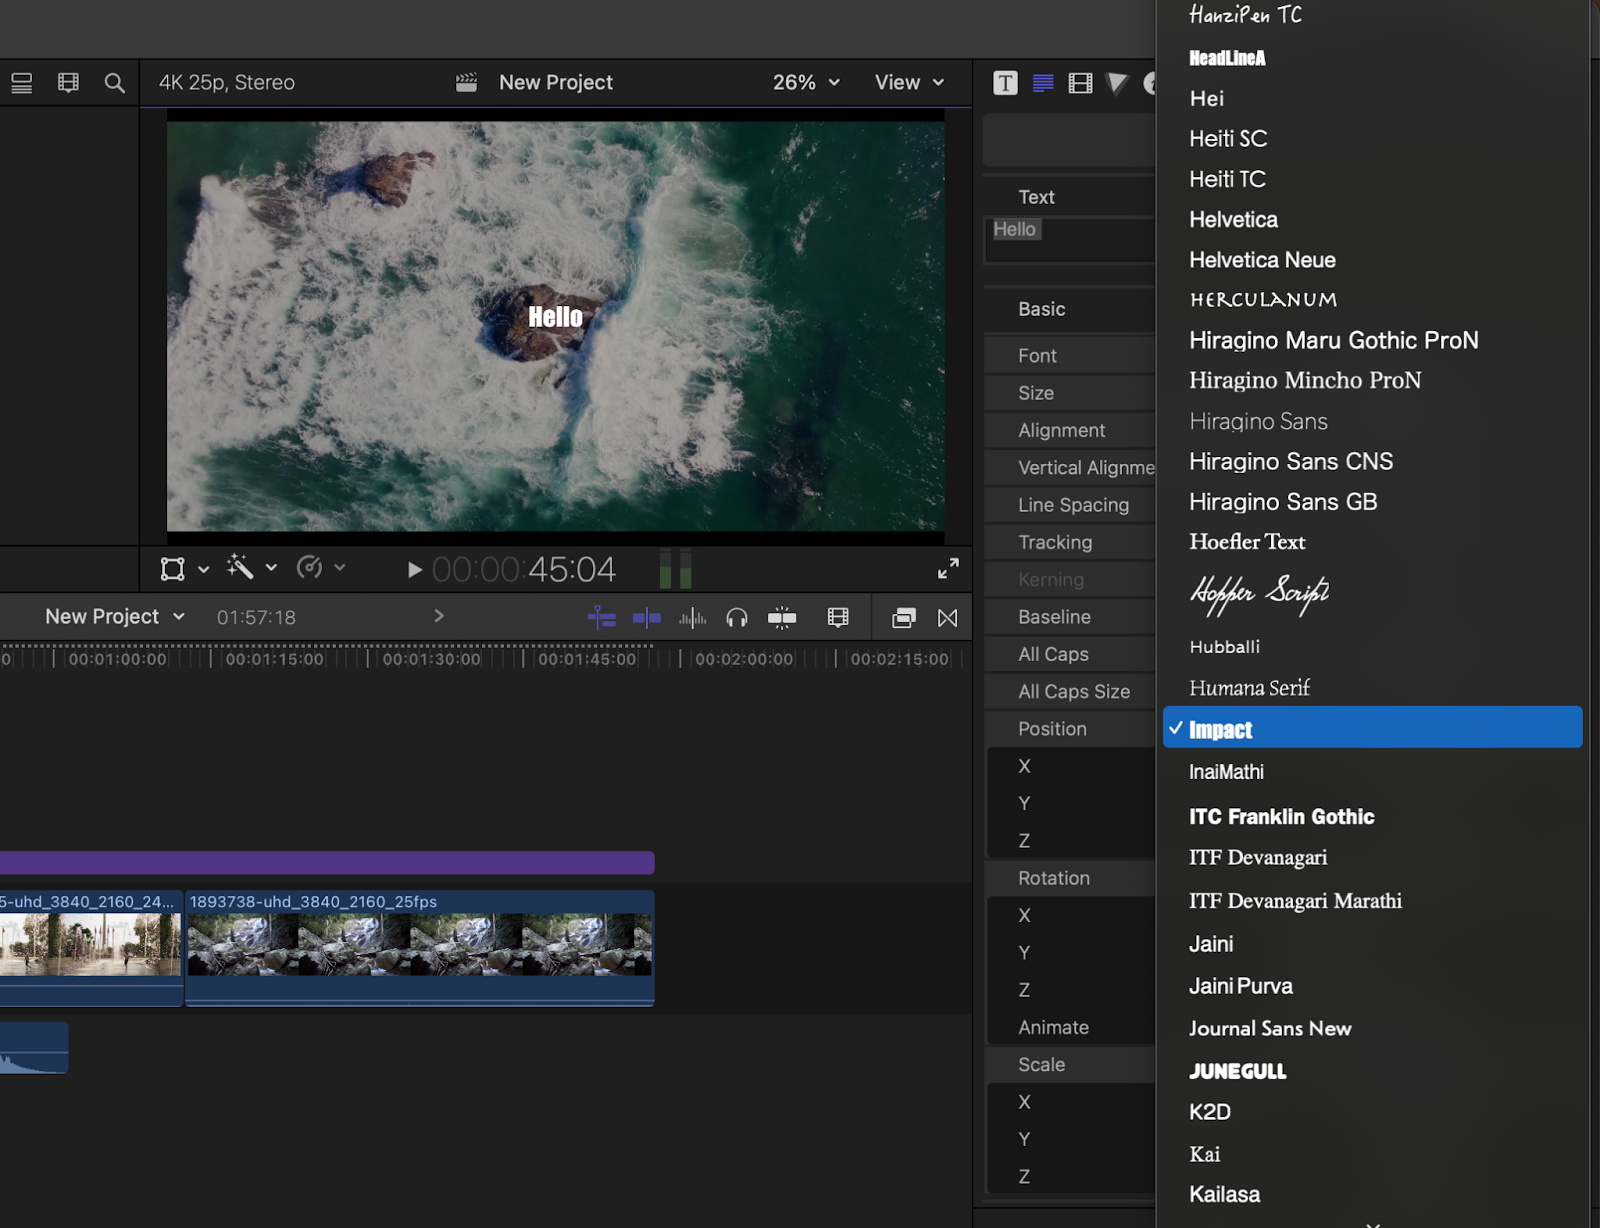
Font
There are multiple inbuilt fonts present in FCP to use directly. You can choose from them as per your choice.
Size
You can change the size of your fonts by scrolling across the Size slider or by entering your desired size value.

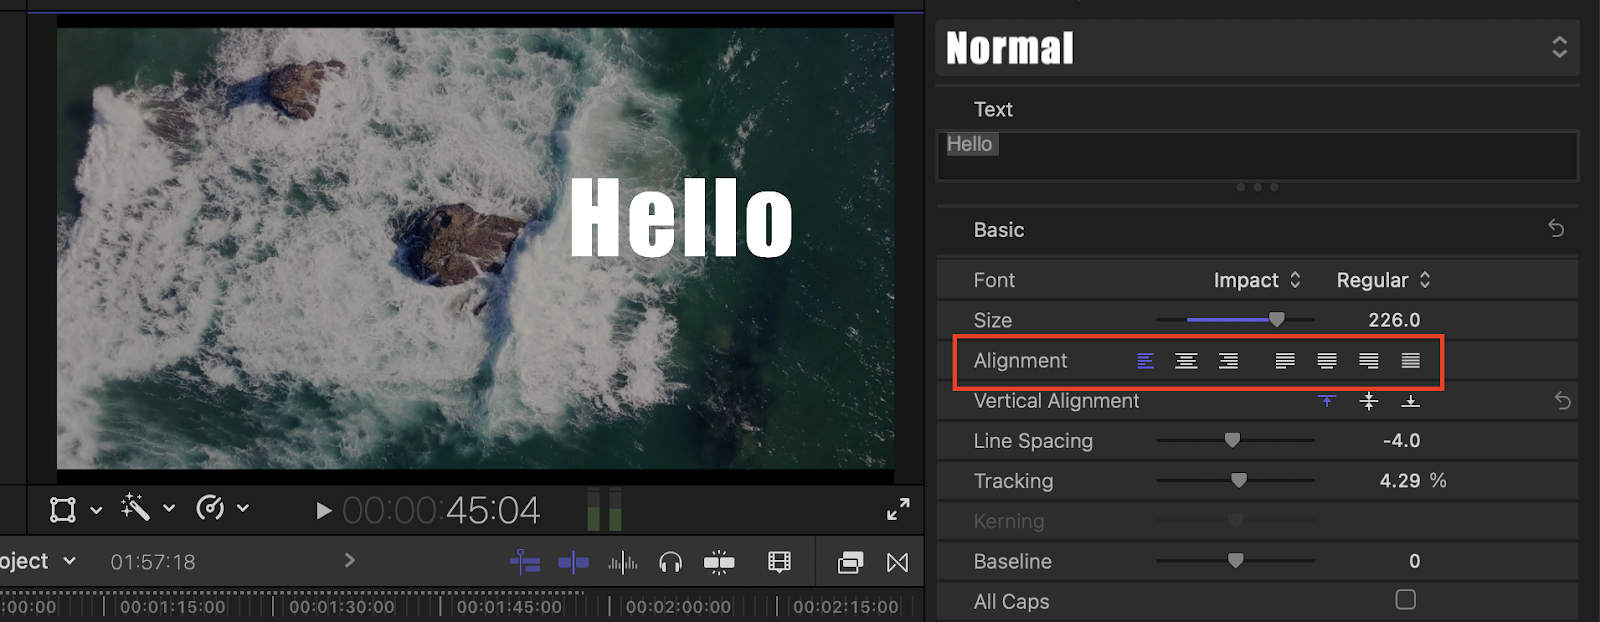
Alignment
With the help of this option, you can change the alignment of the text in the horizontal plane.
Vertical Alignment
You can also change the alignment of texts in the vertical sections of the screen.
Line Spacing
With this tool, you can increase or decrease the space between any two lines of your text.
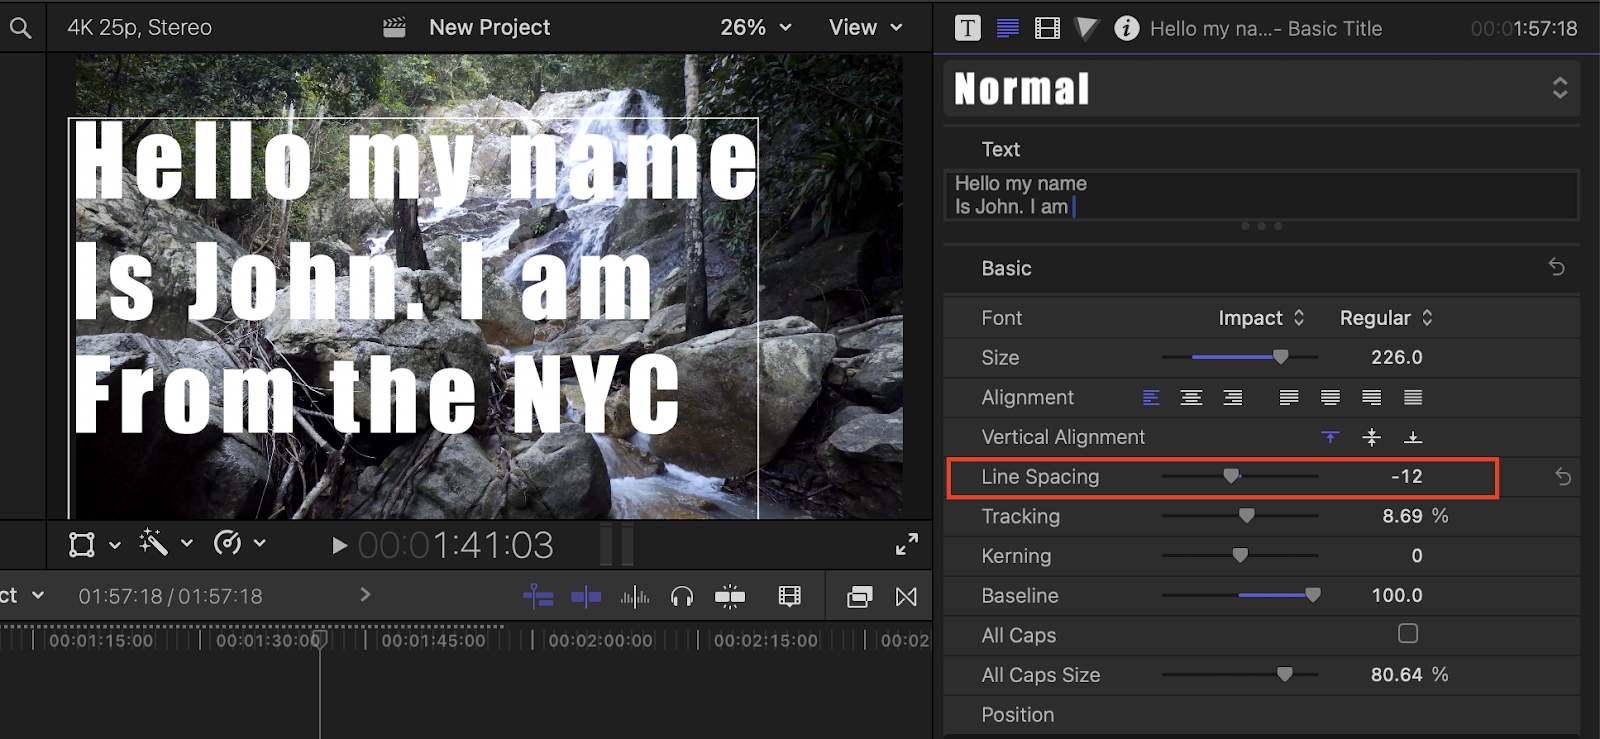
To change line spacing, place the cursor at the end of the first line and use the slider to increase or decrease line spacing. You can also enter a specific value to maintain uniformity across the project.
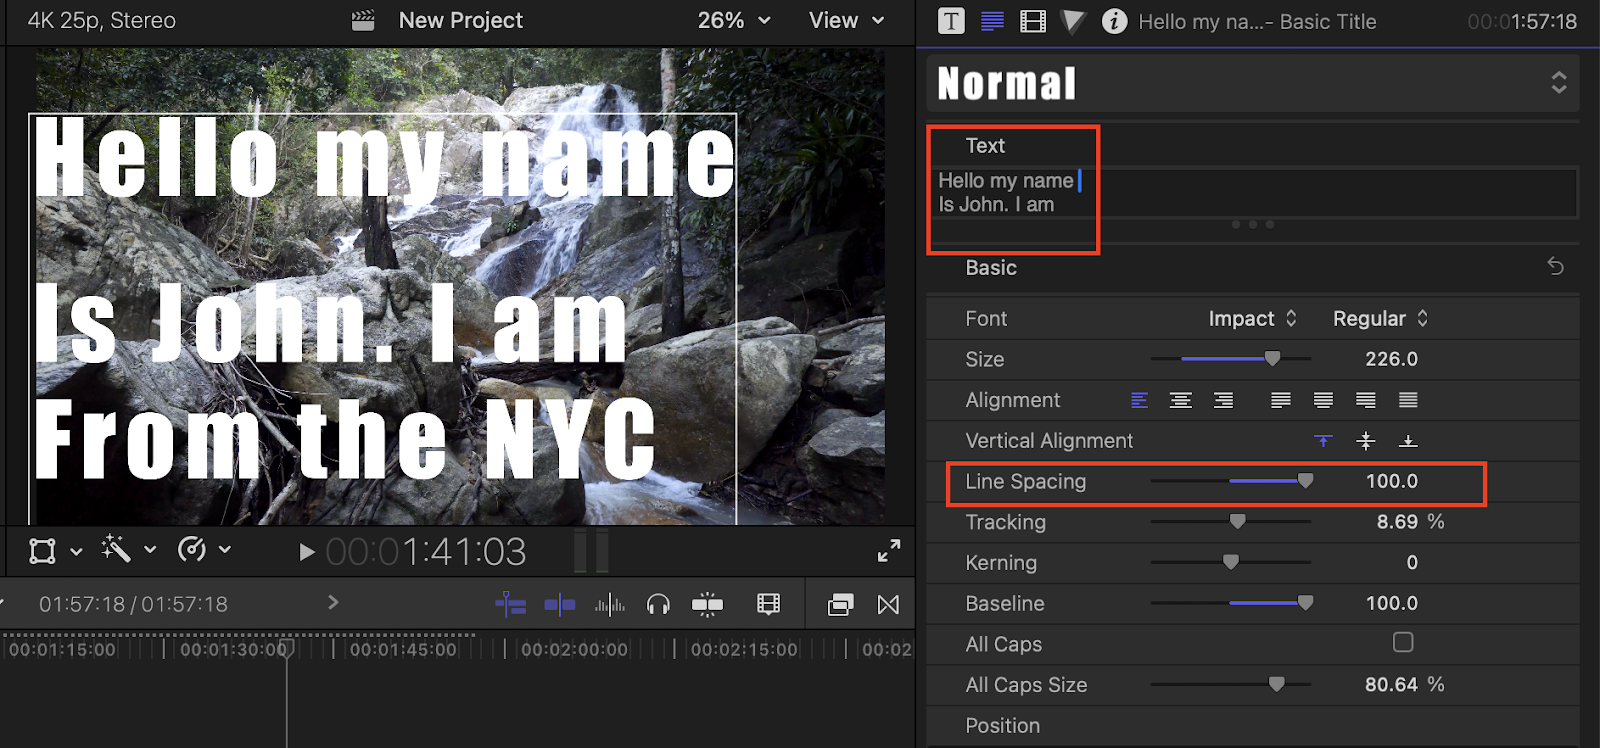
In the above image you can see, that I placed the cursor in between the first two lines and made adjustments in the “Line Spacing,” which increased the line spacing.
Tracking
Tracking allows you to adjust the spacing between different alphabets of a word.
 Here, in this image, you can see that I made the “Tracking” negative and the space between alphabets has decreased. |
 Here I increase the “Tracking,” and the space between letters increases. |
You can also change the “Tracking” settings for a particular word by selecting it.
 You can select the word in the text box or directly in the Viewer as shown in this image. |
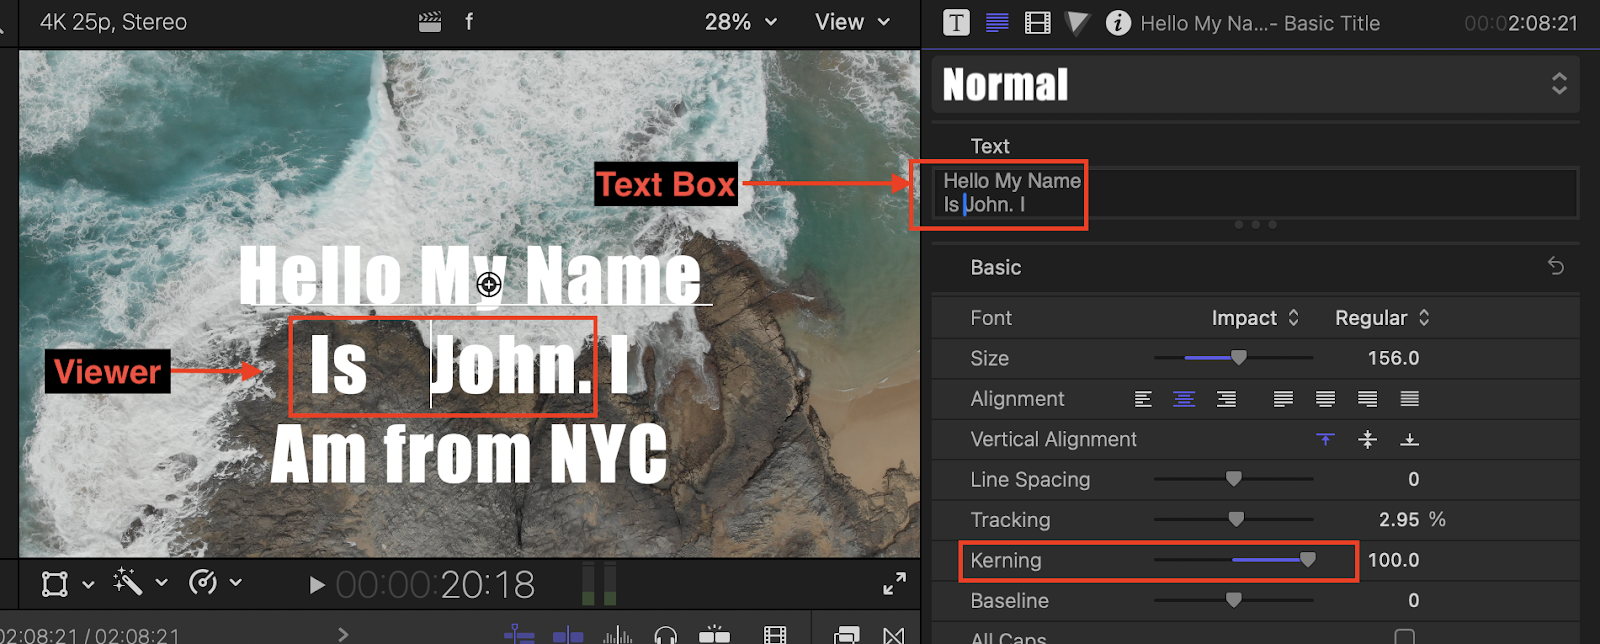
Kerning
With this feature, you can change the space between two words. Place your cursor between the words you wish to edit and scroll the Kerning slider to increase or decrease the space.
Baseline
Baseline allows users to change the position of all or selected texts vertically. As you can see in the screenshots below, adjusting the Baseline slider shifts the text vertically upwards and downwards.

All caps
With this option, you can make all letters capitalized in all sentences or for selected letters/words.
All Caps Size
With this option, you can change the size of all capital letters.

Position
By this option we can change the position of the texts on the different axis (X, Y, Z).

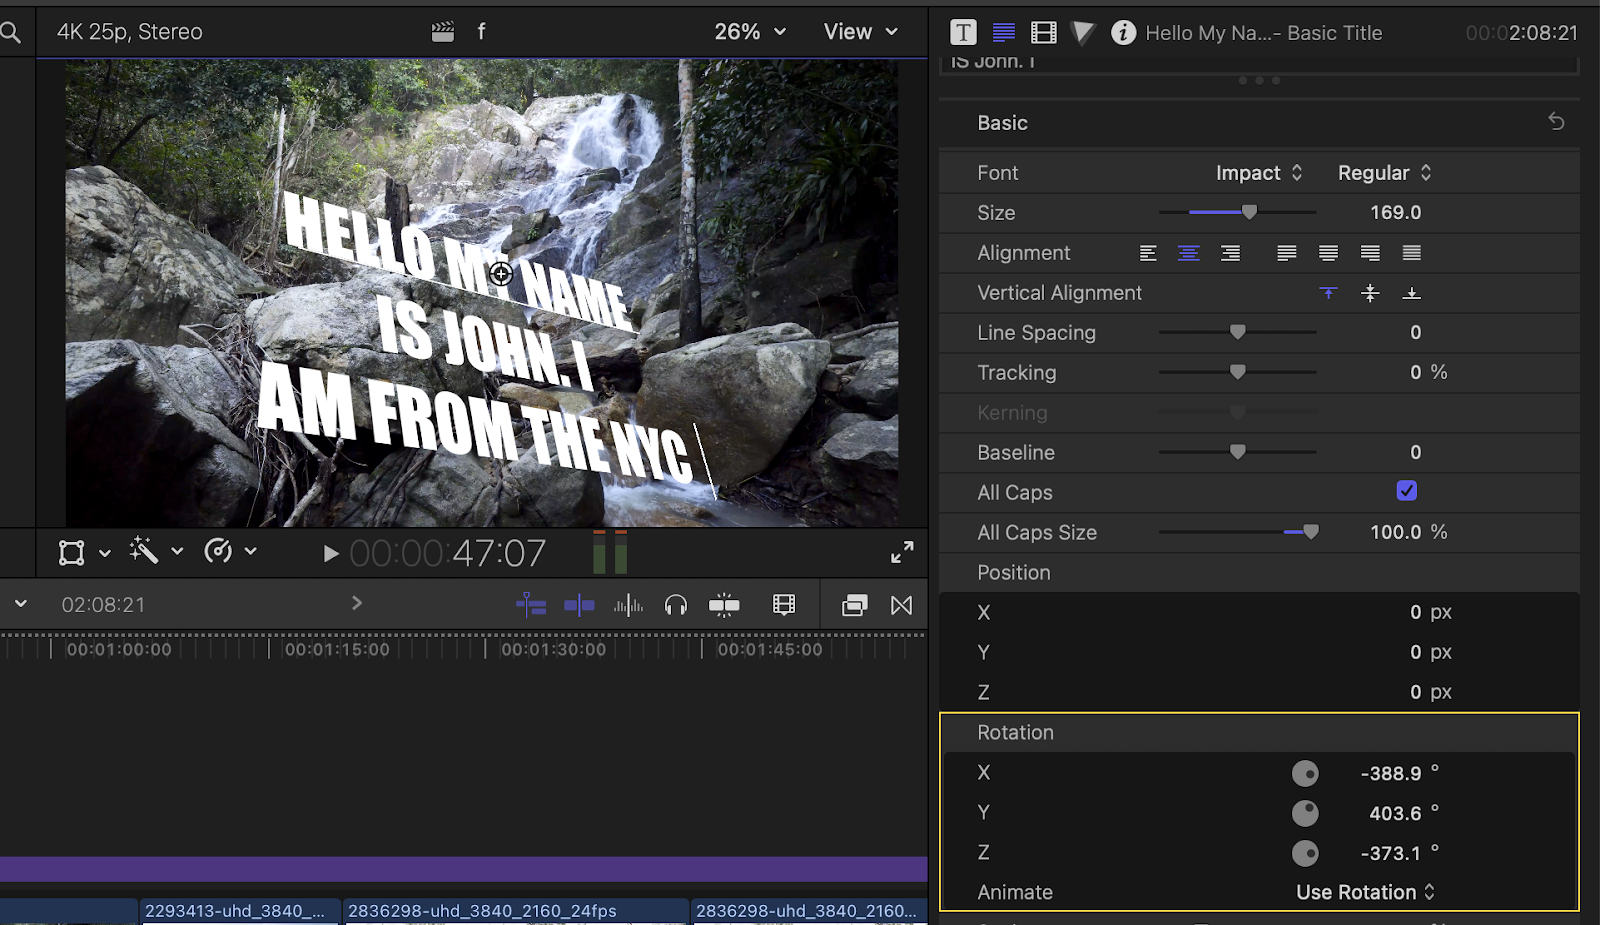
Rotation
FCP allows you to rotate your text along the X, Y, and Z axis, giving a 3D space to place your text in.
Scale
This tool helps you to expand or contract your text on a particular axis.

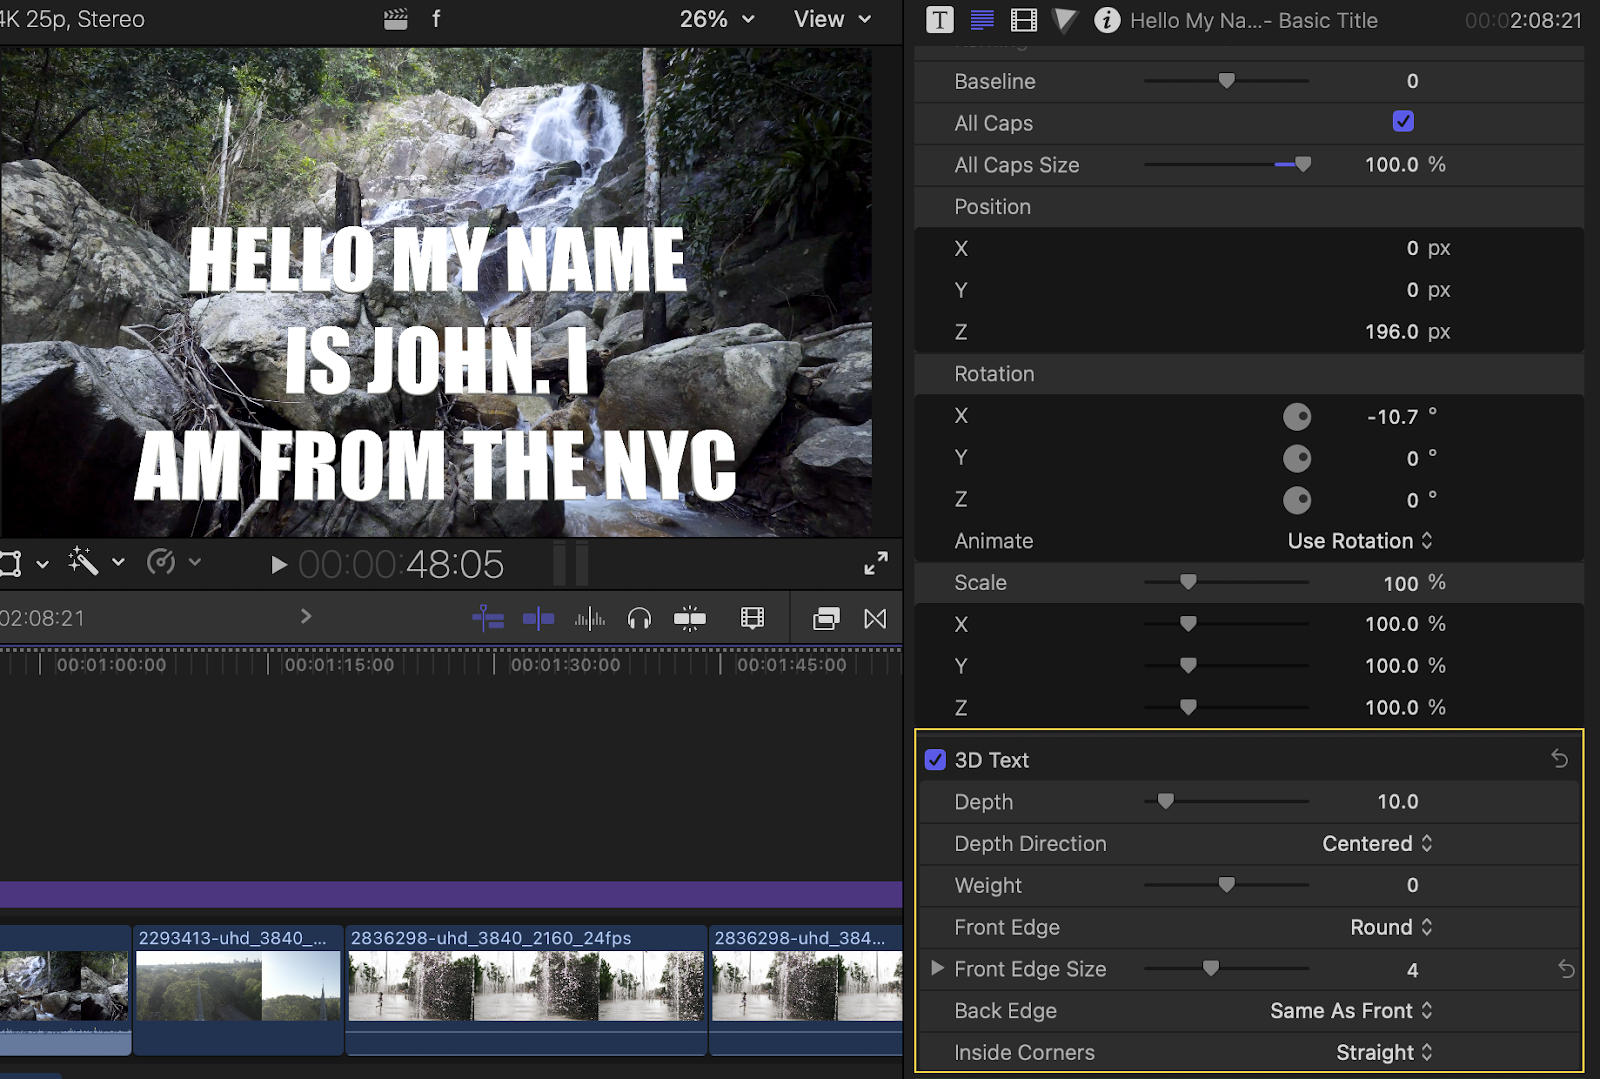
3D Text
In FCP, you can convert your plane text into 3D Text. After applying the 3D effect to the text, you can also change its Depth, Weight, Front Edge size, etc.
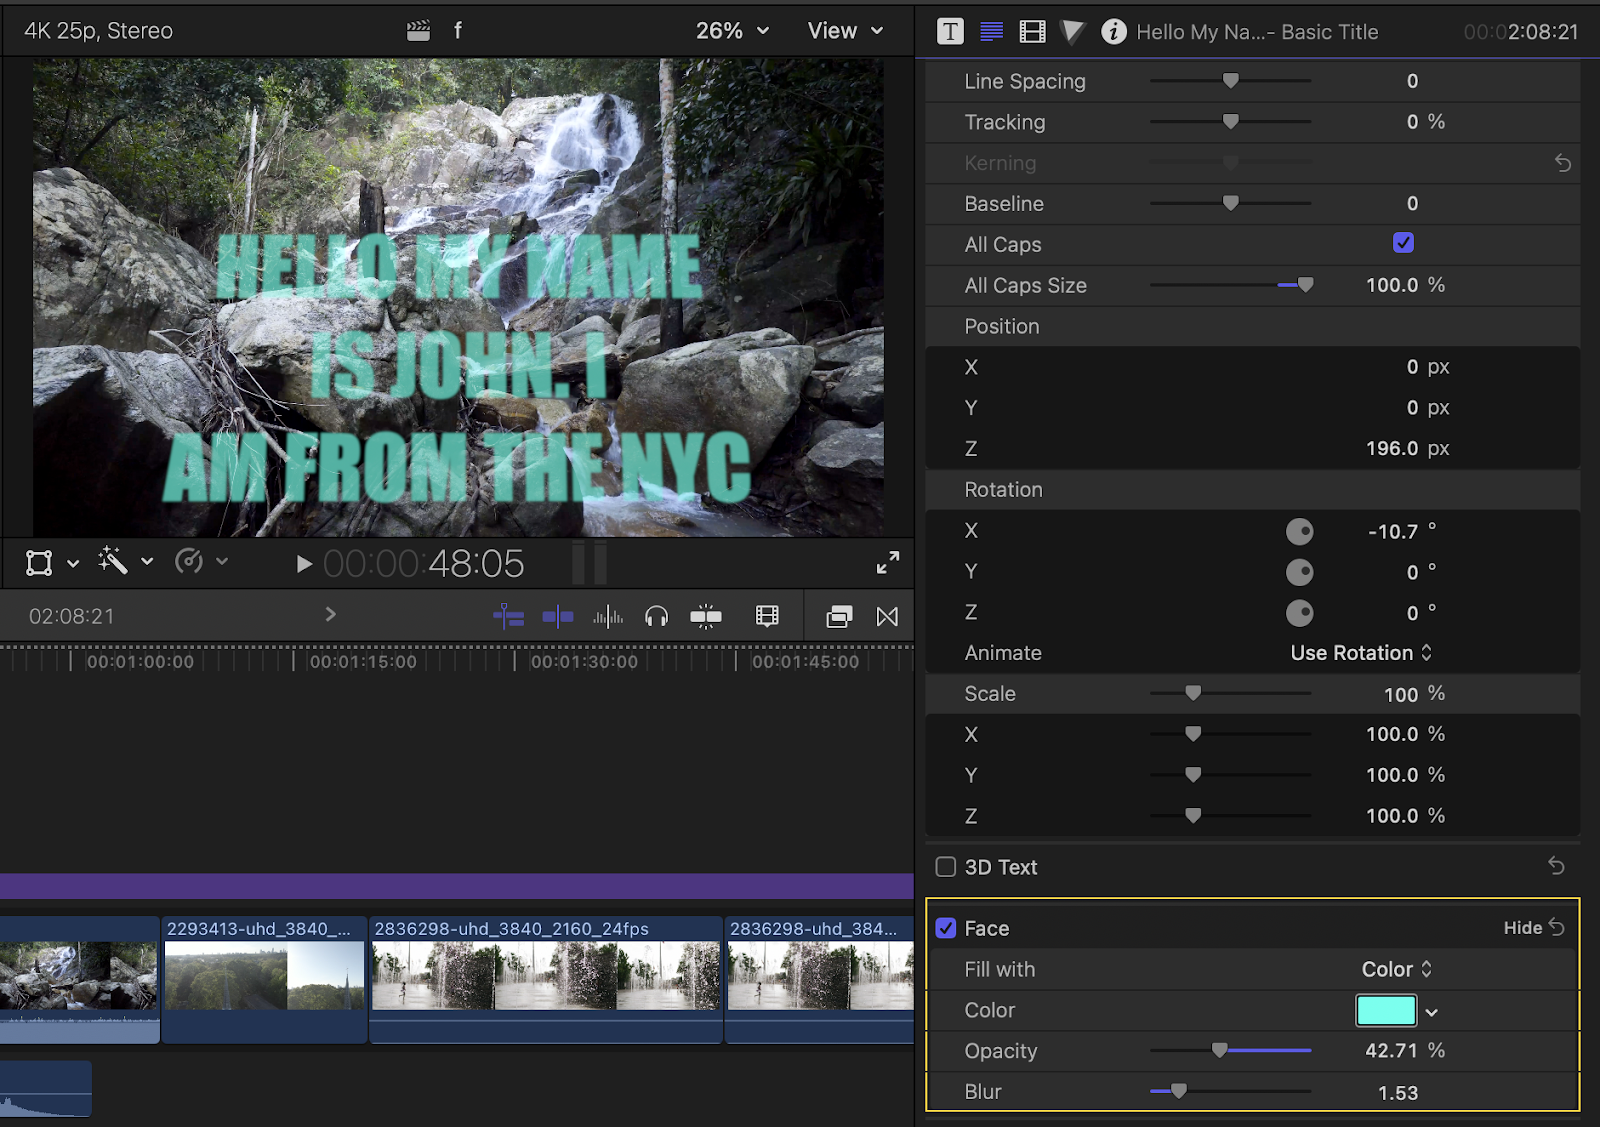
Face
With this tool, we can change the Color and Opacity of the text and add a Blur effect to it.
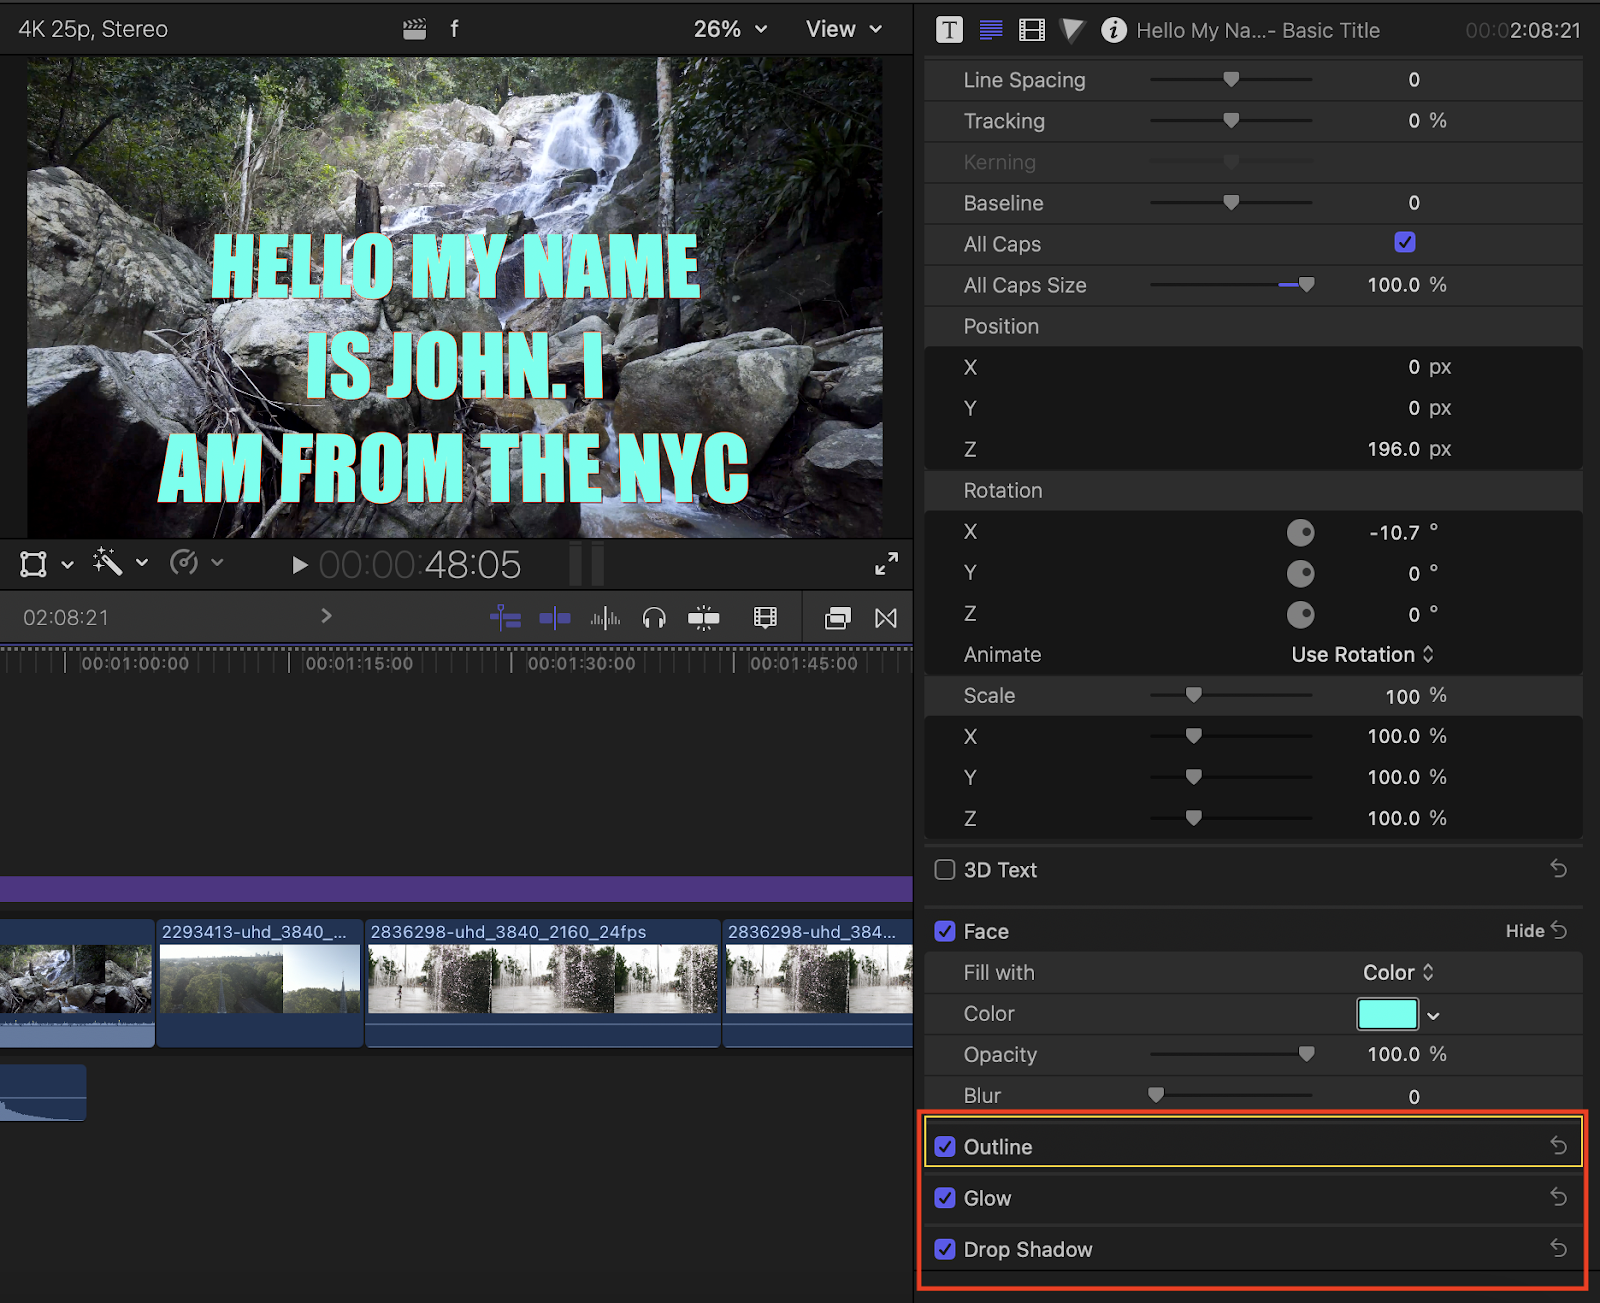
Outline, Glow, and Drop Shadow
We can add each of these effects just by checking on their respective box.
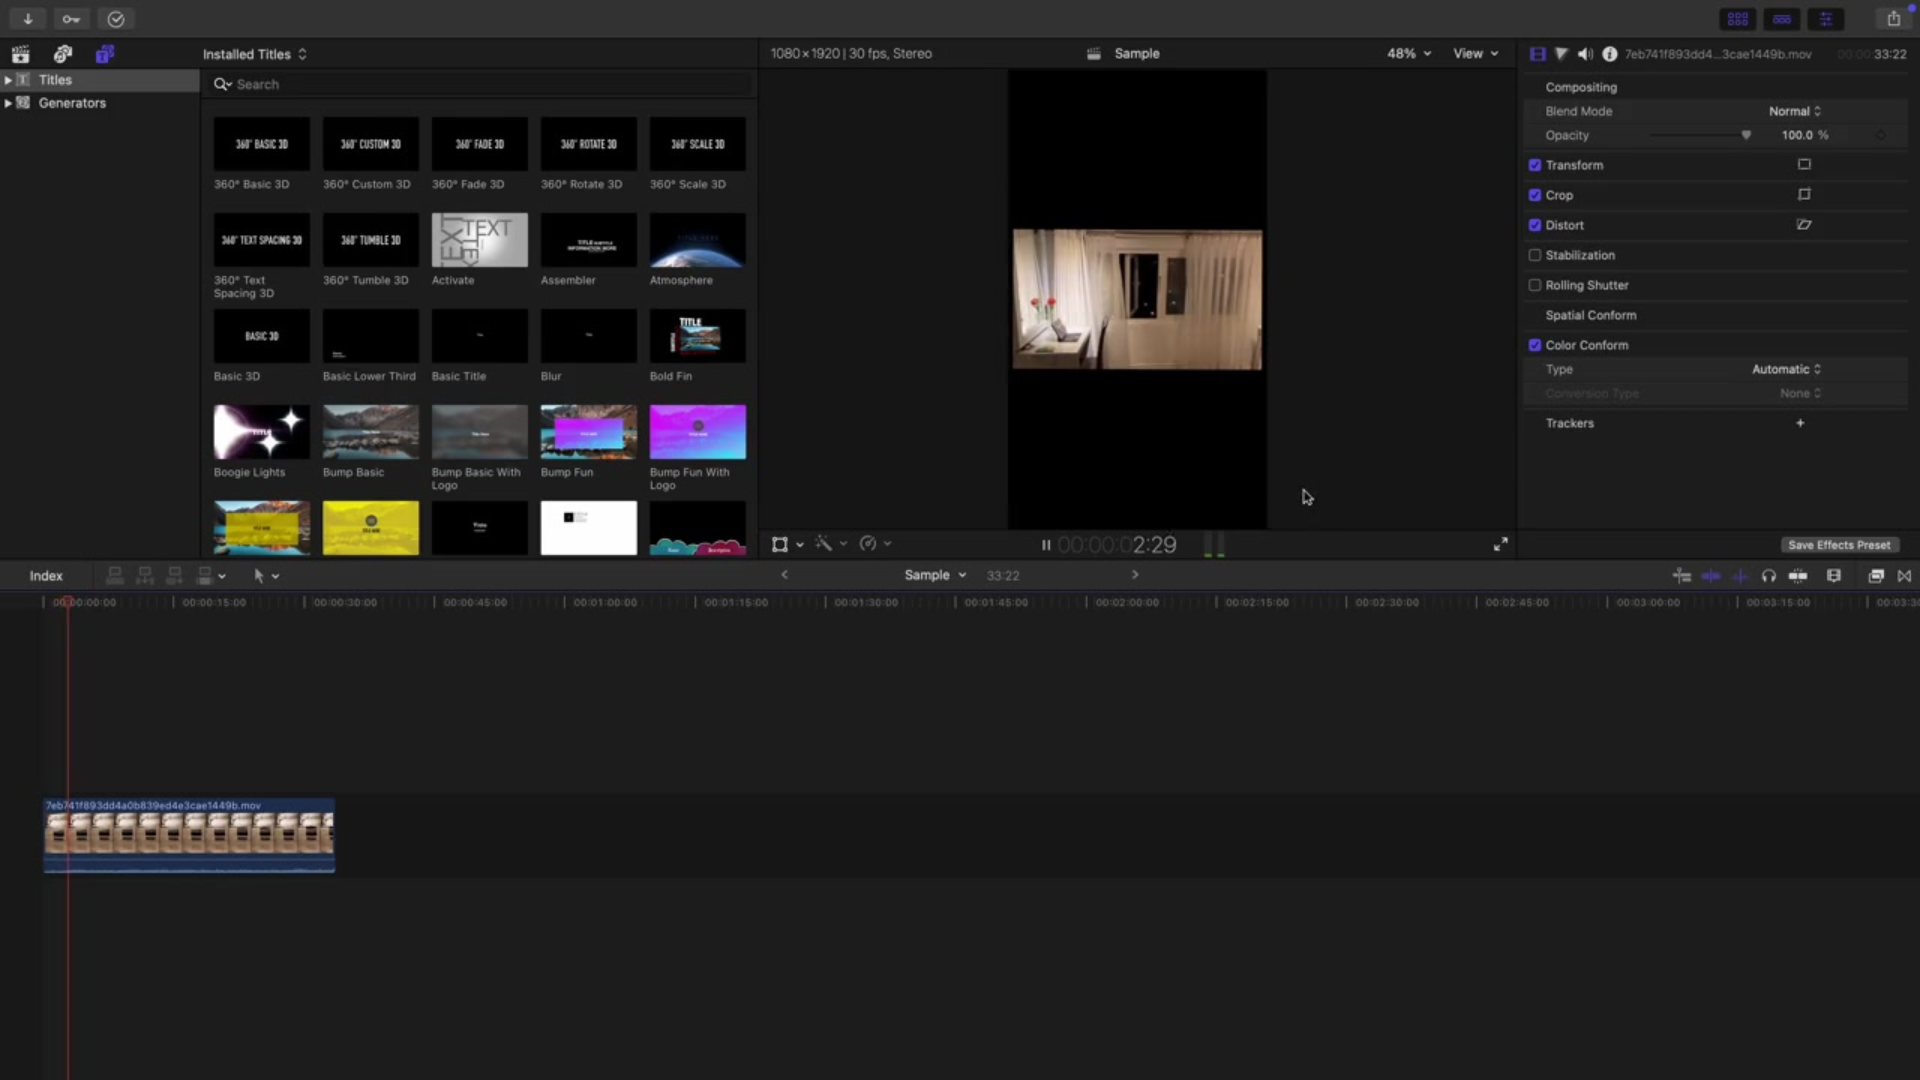
Adding Other Installed Titles
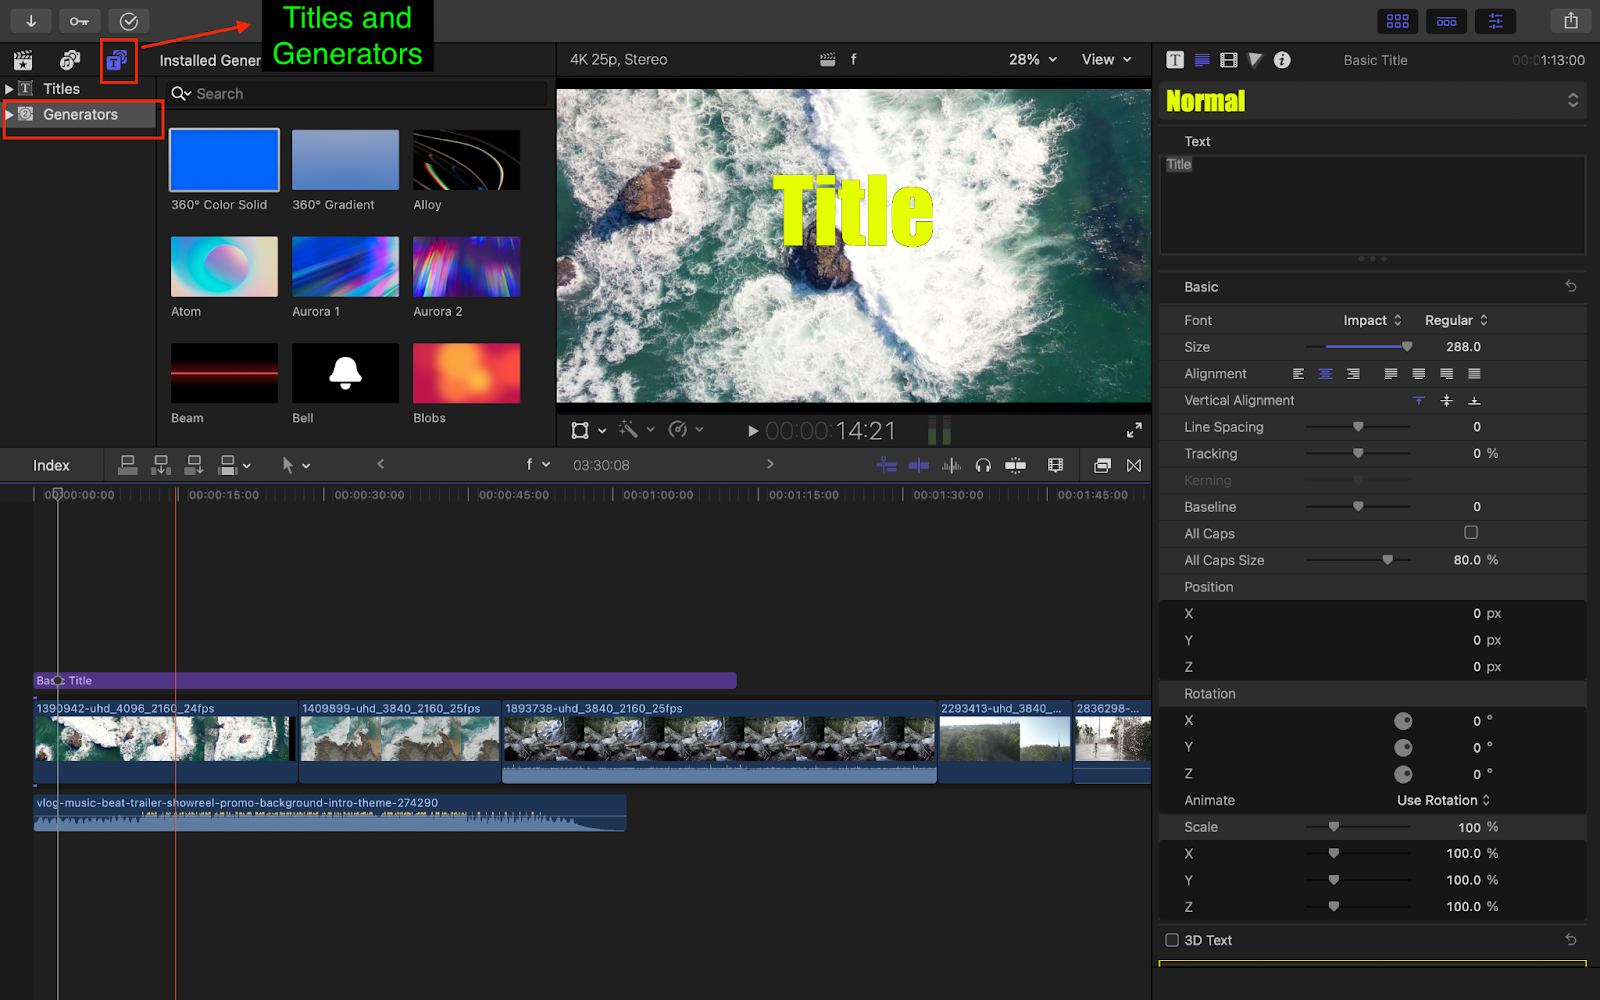
FCP has a bundle of premade Titles that need less customization. To access these, you can click on “Titles and Generators.”

You can also buy premade premium templates from platforms such as Envato and MotionArray.
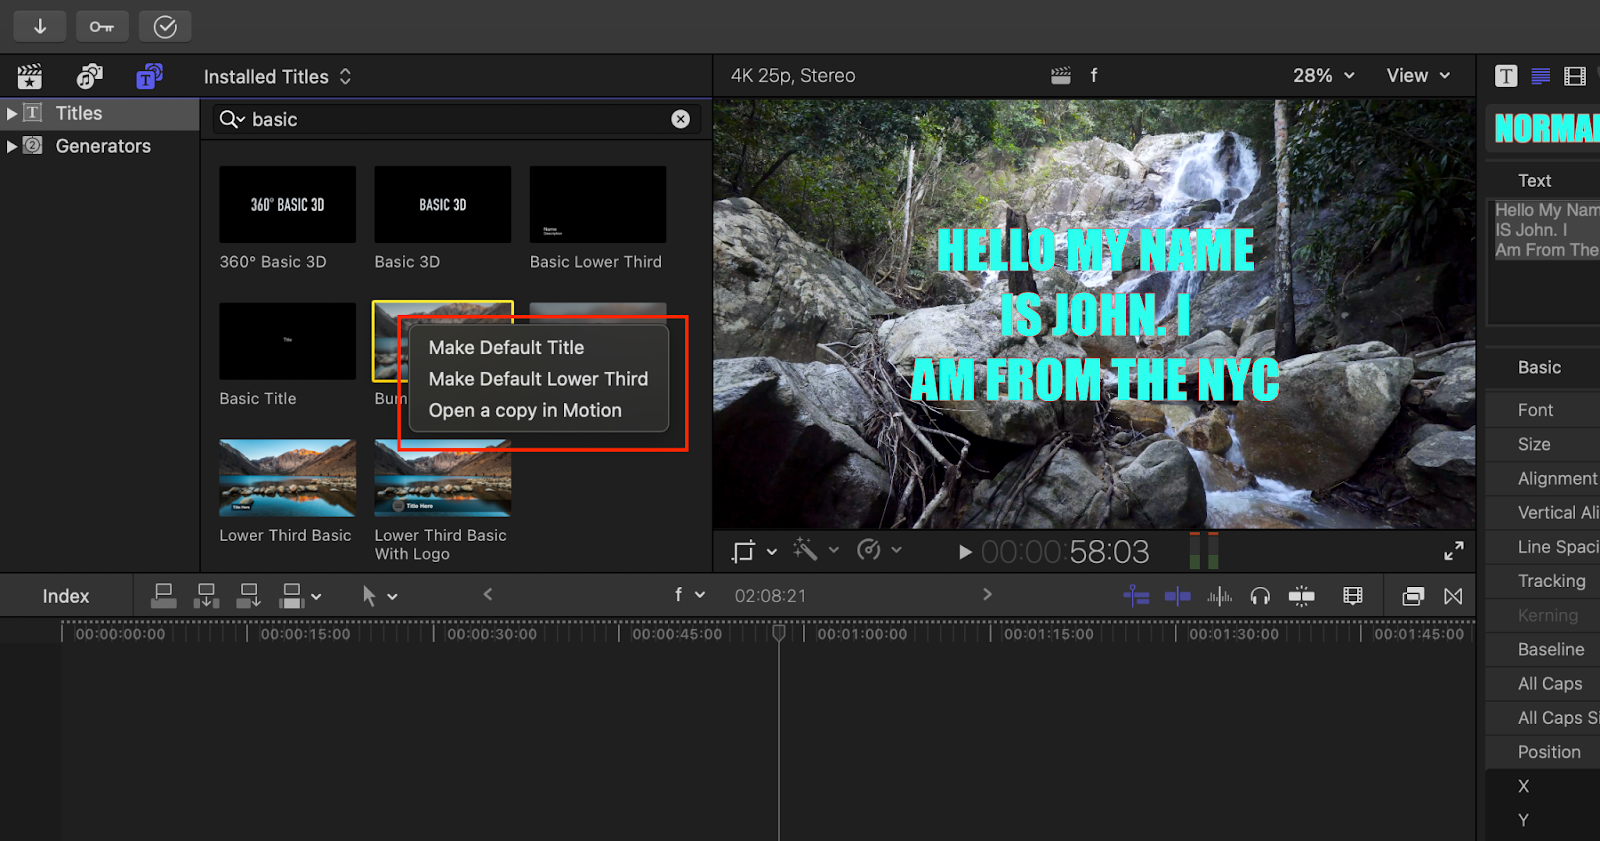
You can also add a Basic Title from the “Titles and Generators” window, search “Basic Title” in the “Titles” section and you can change your default “Title” and “Lower Third” which you add with a shortcut. To make the default title do a double click (two-finger click on the trackpad) on the title (which you want to make default) and choose the option from the box that appears on the screen accordingly.
How to Add Color Background to Text
Background color can make your text stand out. While there is no direct option to add backgrounds in the text inspector, you can add one with the help of “Generators.”
(Generators– Generators are premade customizable clips that are used to create various kinds of backgrounds, shapes, etc.)
To add a Generator to your timeline click on the “Titles and Generators” button to open the sidebar. Within it click on “Generators.”
You can add a variety of backgrounds such as a simple color background, a gradient background, or more available in the Generator section.
To add a simple color background choose “360° Color Solid” and drag it to the timeline.
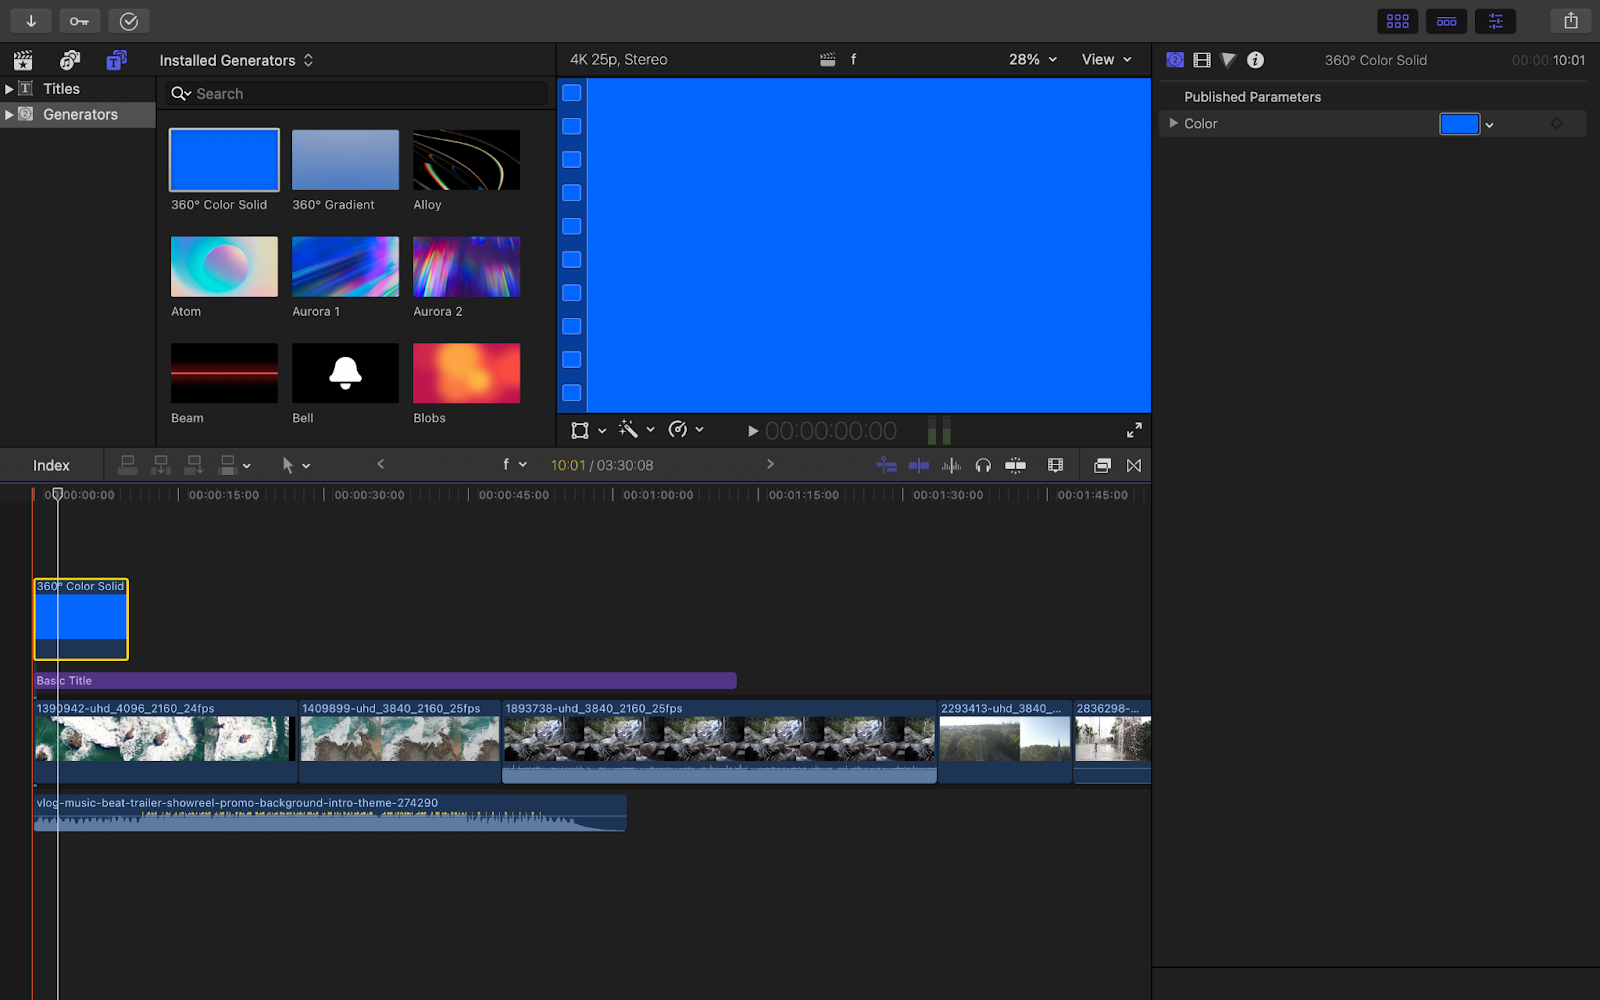
You can adjust the Generator layer based on your needs. Here we want to add a background to the text so we keep the Generator layer below the text layer.
You can change the color of the background in the “Color” section present within the “Generator Inspector” on the right corner of your screen.

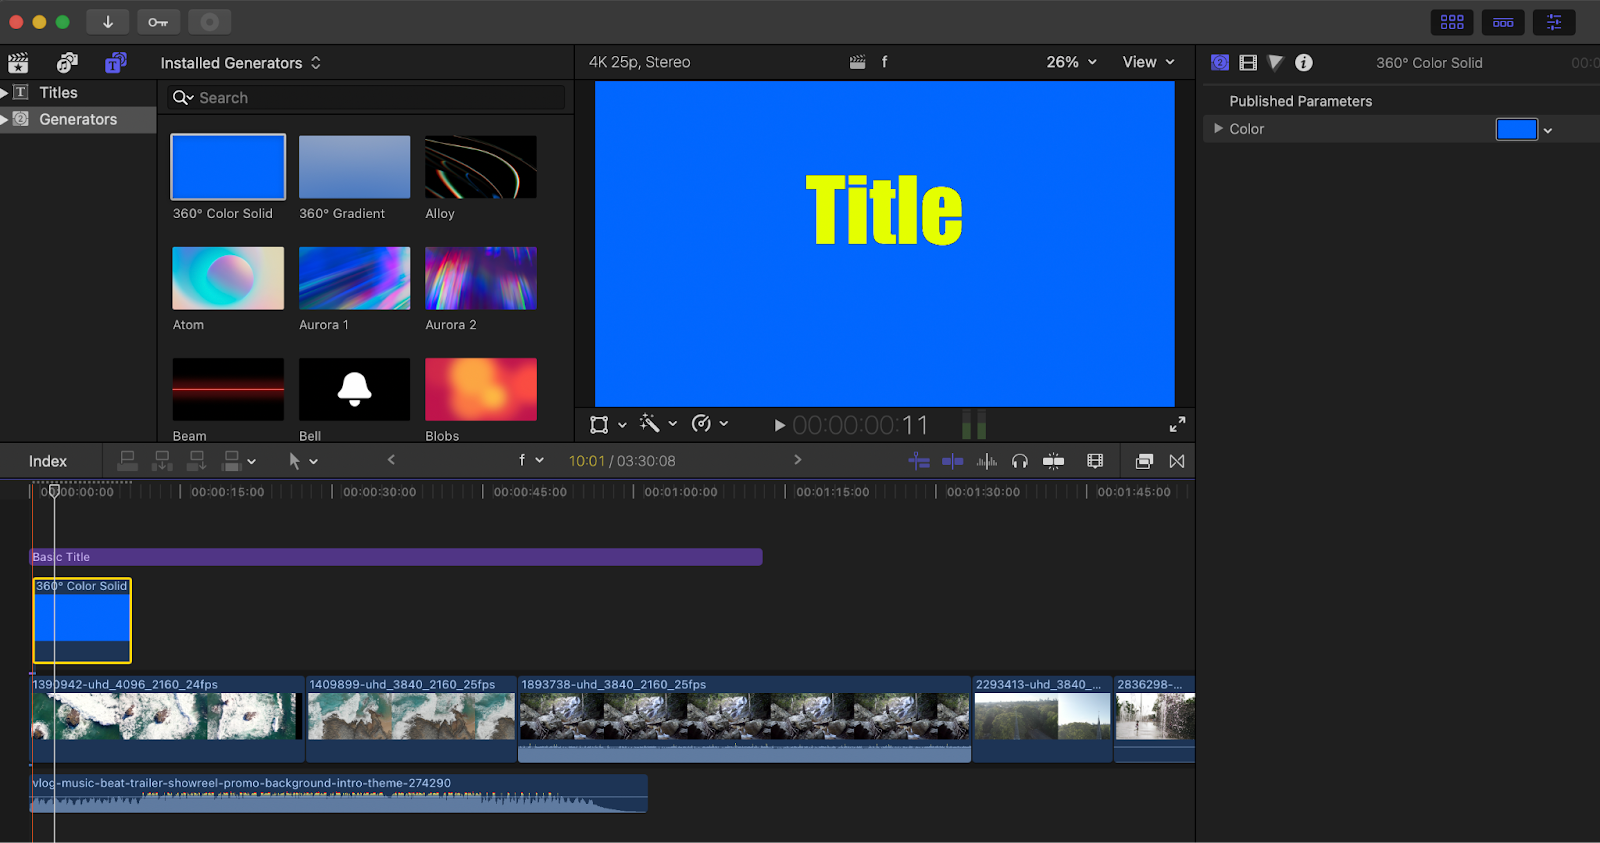
You can crop the background in the “Video Inspector” of that particular Generator.

 Customizable Gradient Background |
So that is how you can add text in FCP. It is an easy process and your curious experiments can allow you to explore different text styles and effects combinations to get stunning results.
Keep editing and learning.